- sztojanov
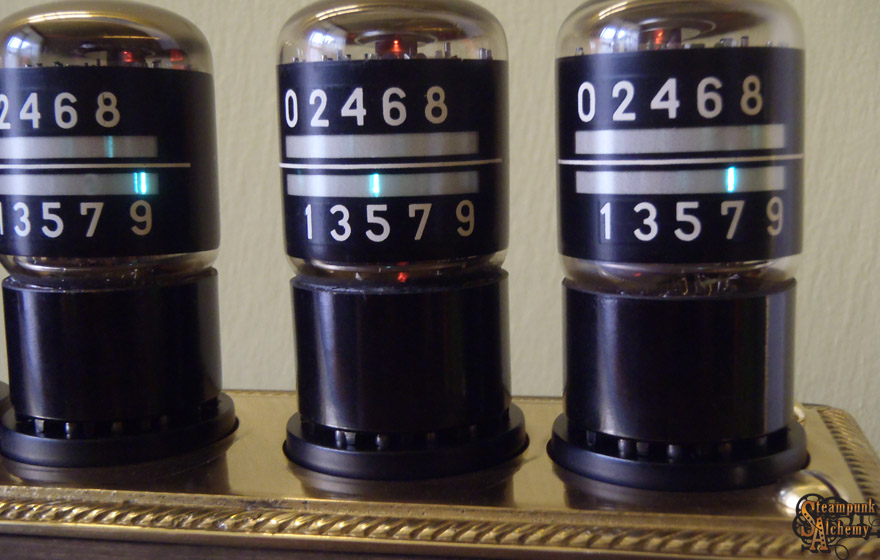
After the nixie-trio I felt like I should build another kind of clock. A thought started to form back when I was planning the dosiemeters! But what should it be like? Maybe a clock with Decatron tubes or a clock with a CRT tube... the final product is almost a mix between the two, the E1T trochotron tubes combine the technologies of decatron and cathode-ray tubes!

Not many know the difference between dekatron and trochotron tubes; and it is not only that in the latter ones' case the tubes are "labeled" at the factory! The trochotrons does not operate by gas-discharge but deflected electron beams, so based on their structure they are closer to an old CRT television than to any nixie tube. That is why they mustn't be mixed up! The "E1T" of the 50's is not a display but a counter tube...
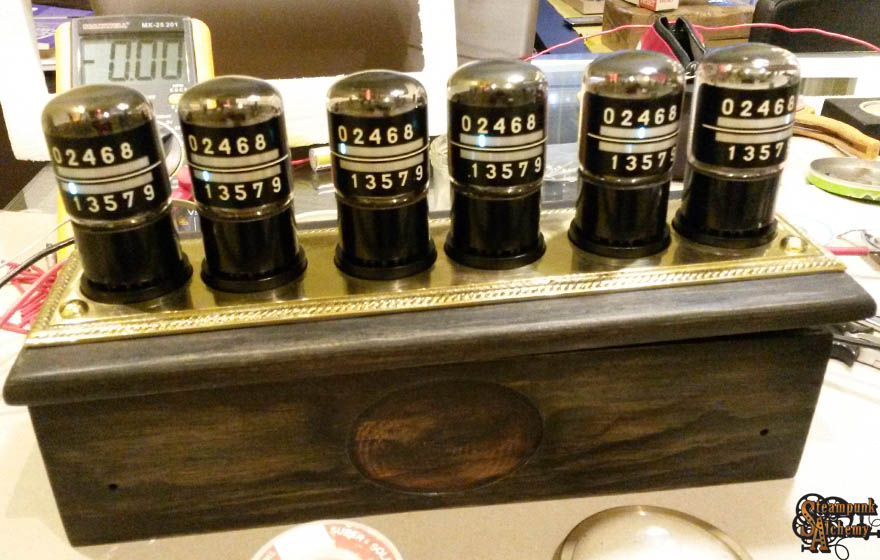
Very few E1T clocks have been built around the world up to this day. Most of them has one tube only, maybe because of its high price or cause there's so few tubes left that are intact. Many years ago I managed to acquire a fitting 6-piece set, and on a fairly good price! They are in their original boxes, NOS! The time has come to start working on the clock.

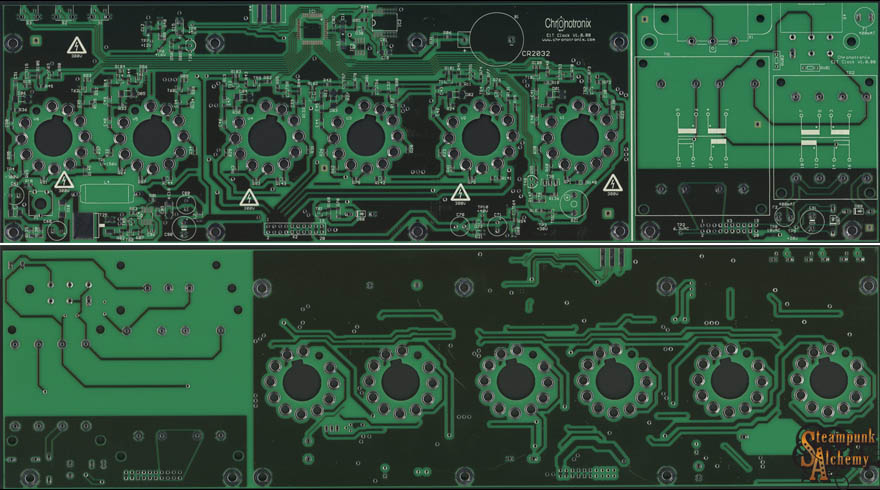
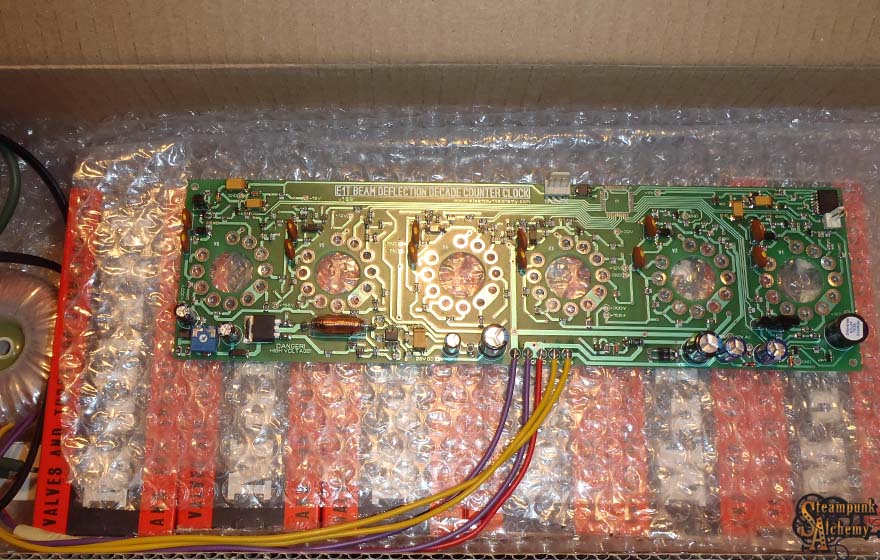
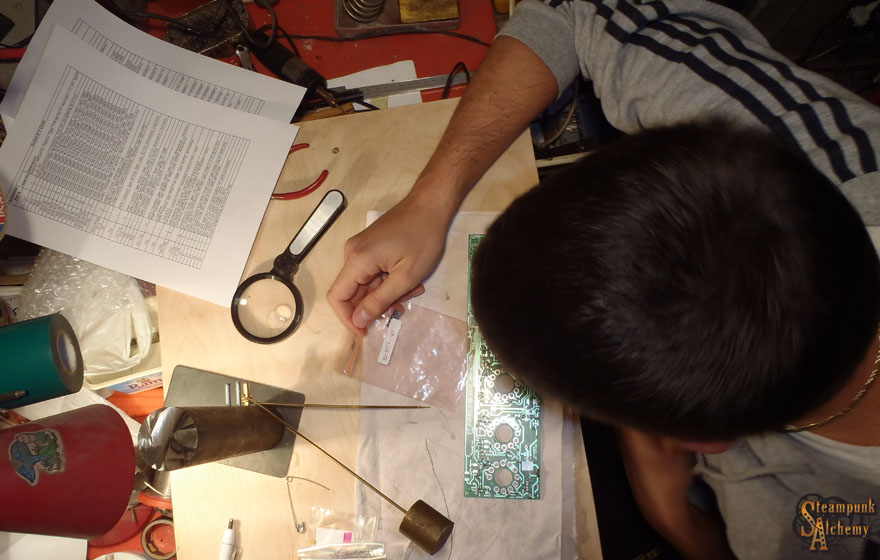
The starting point was Dieter Waechter, a very clever nixie (and other) tube enthusiast's sandwich-panel project. I didn't have any work to do with the pre-programmed CPU, but there were a lot of unattainable and not too practical parts on the electronics' panel, not to mention that I found it huge because of the numerous THT parts. I completely redesigned the clock's electronics by dissecting the schematic diagram and the original PCB design I got from Dieter, piece by piece – almost from scratch!
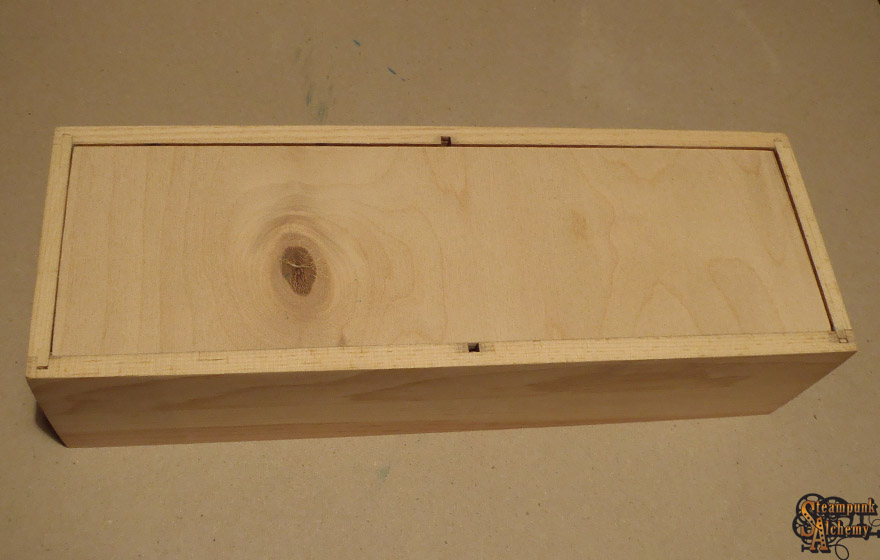
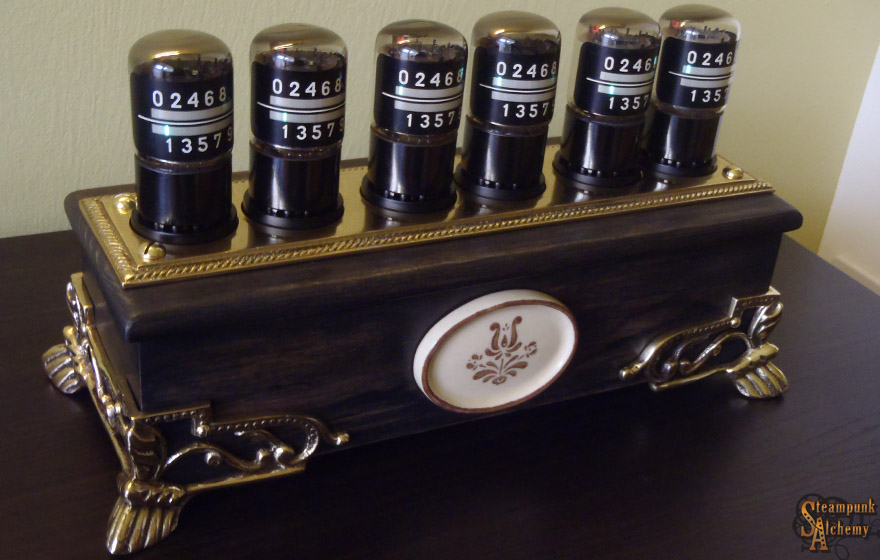
In order to find out the maximum size I can work with, before almost anything else, I had to pick the final box before I'm finished with the first PCB prototype. I've been thinking about building a home-made box after my own design but the final decision was made – after a lot of searching – in favour of an antique recipe box made by the american Pfaltzgraff company that sells pots, ceramics and kitchenware, since 1811.
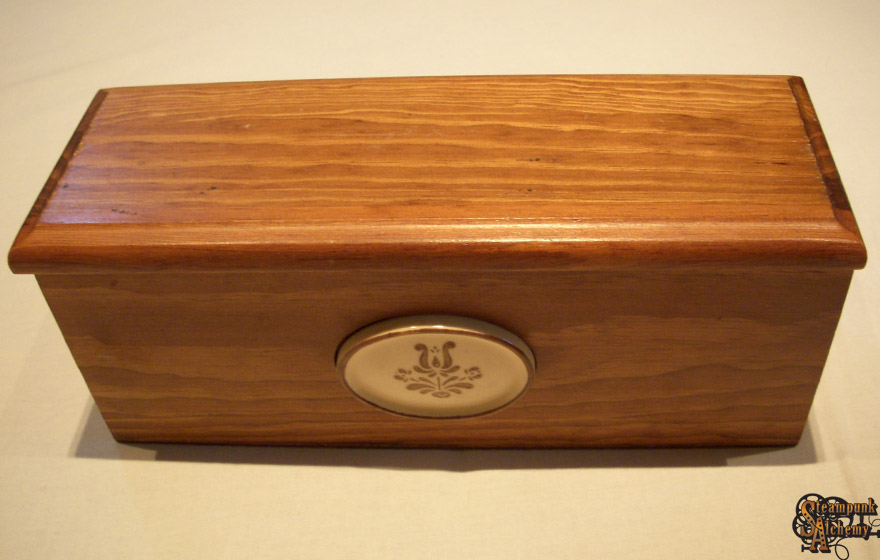
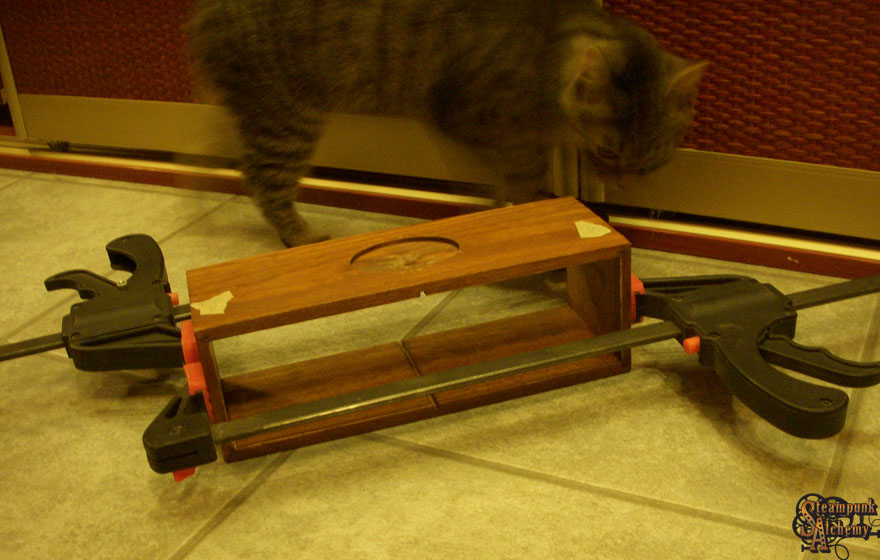
It is cca. fifty years old, made of some kind of a pine tree, and has a beautiful wood grain pattern. The inside parameters were already given but I found it's too high so I had to modify it. There were smaller cracks on it that resulted from its age; there were faults mainly at its edges that needed fixing. I simply couldn't risk the possibility of this wonderful antique wooden box falling to pieces in my hands during the later stages of processing. On the picture below Boriszka supervises the drying process.

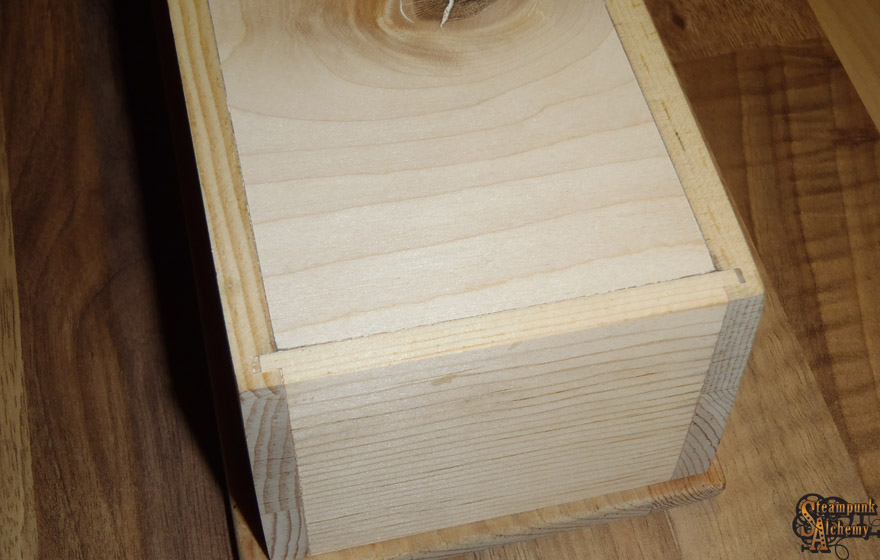
I managed to replace the ugly underside – that was originally a spliced, lame fibreboard – with one that matched in color and even with the wood grain's pattern. The new one is sunken with a wood grain similar to the original box, so it fits much better to its style.
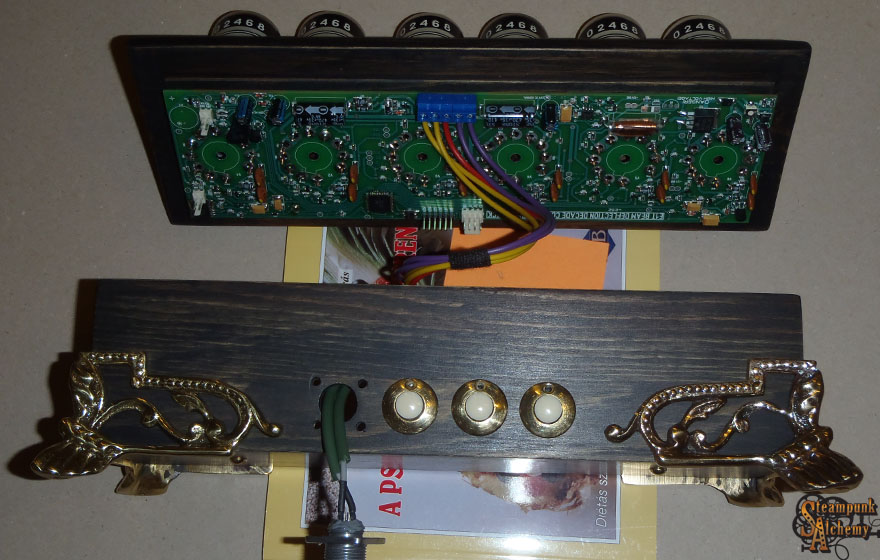
The inside parameters are all set, so, now knowing the exact sizes I can get started on the PCB! A few months later, after activating the prototype it worked beautifully! A long term test followed throughout a four week period...
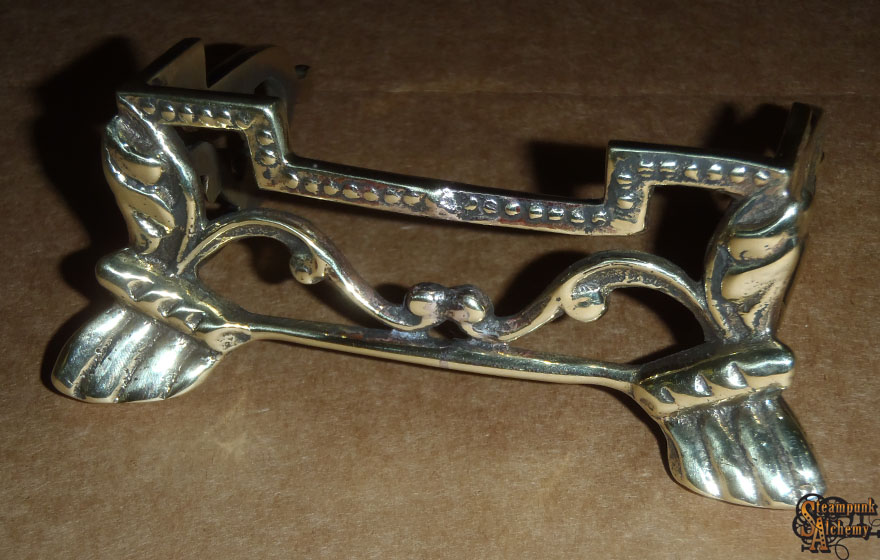
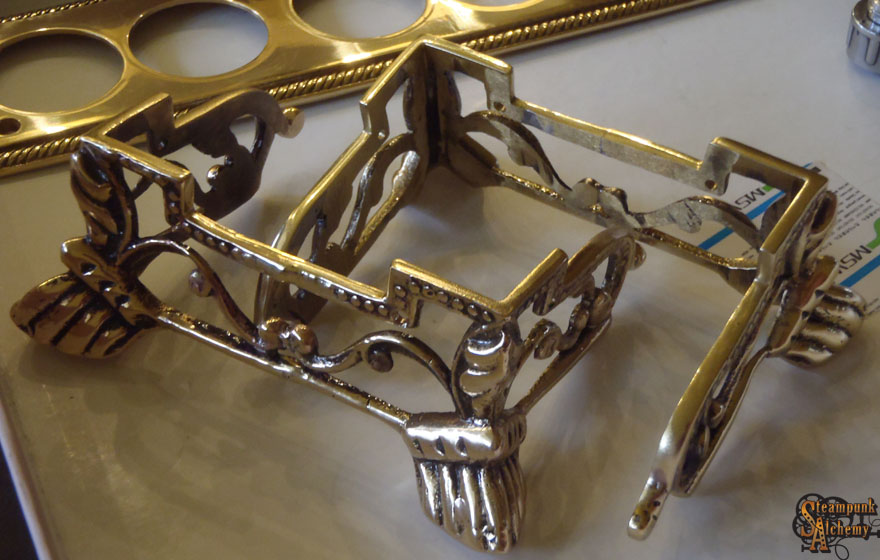
At the same time I kept redesigning the box. I managed to get hold of four antique brass legs – not surprisingly – also from the overseas. There were quite a few things to be modified on them in order for it to live up to my individual demands perfectly!
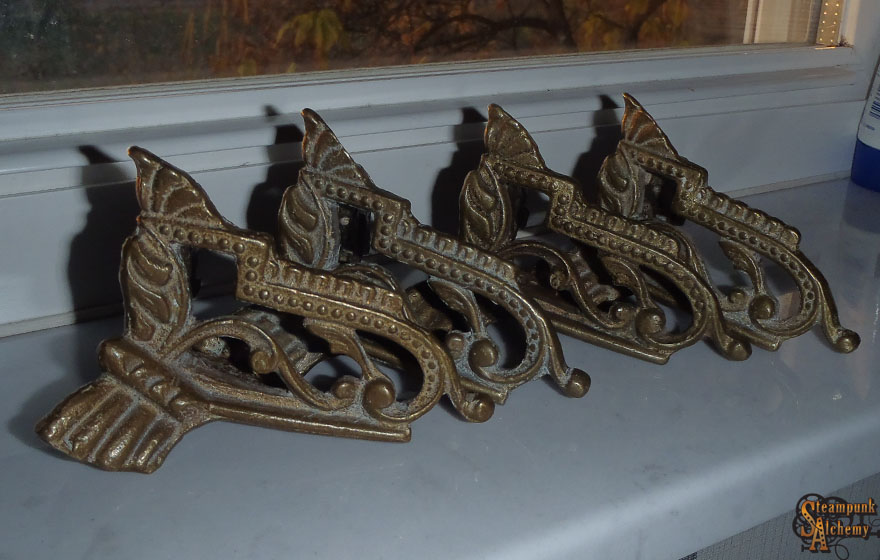
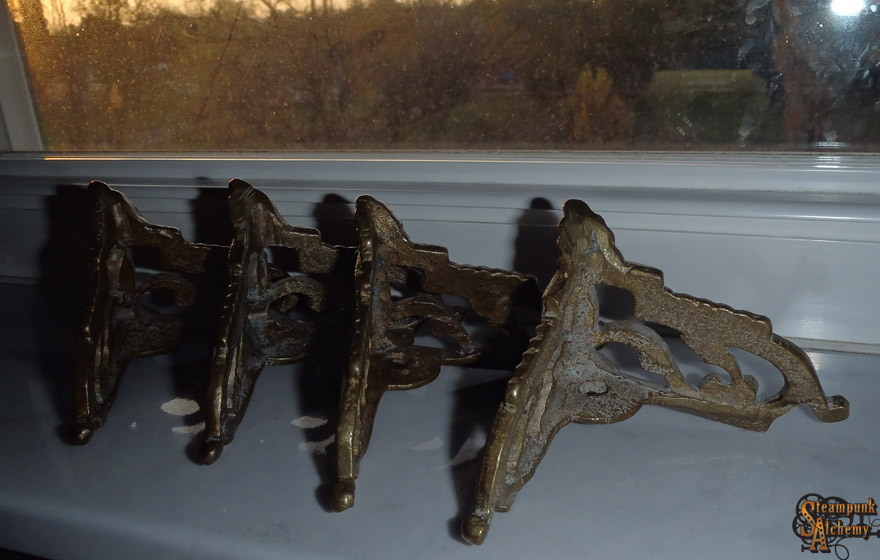
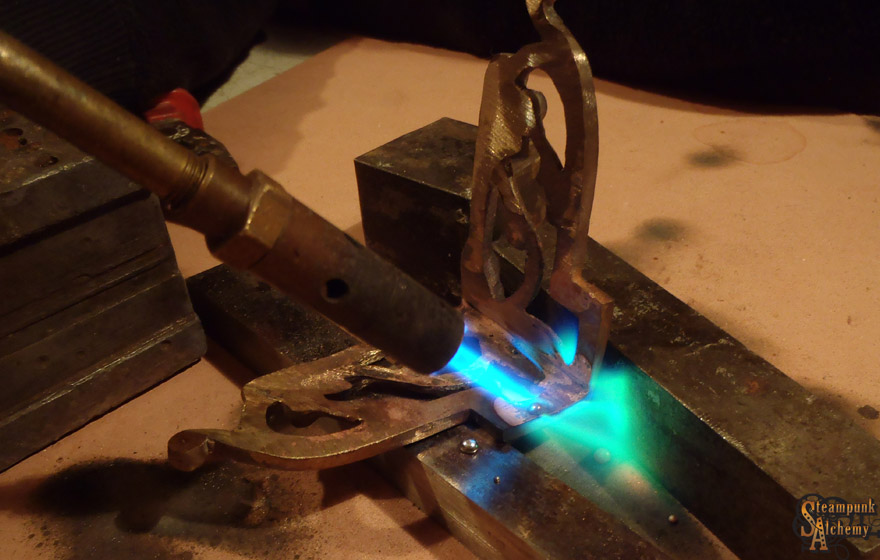
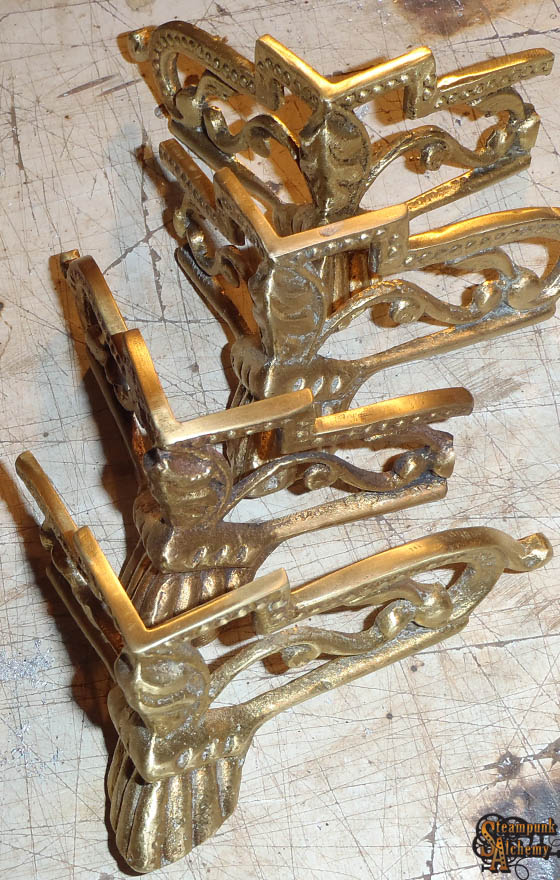
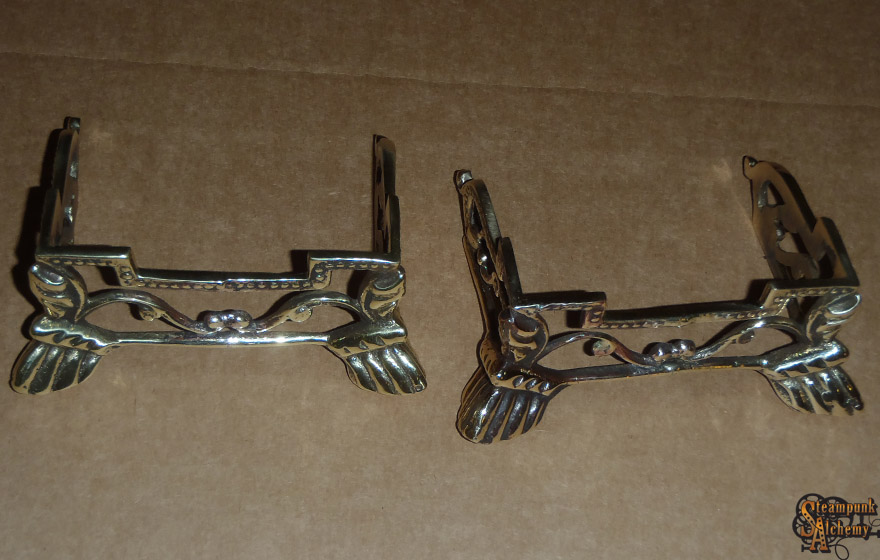
By cutting the legs two-by-two, slightly modifying them and soldering them together I managed to create an adequate frame for both sides of the pine box. I was satisfied with them after polishing!
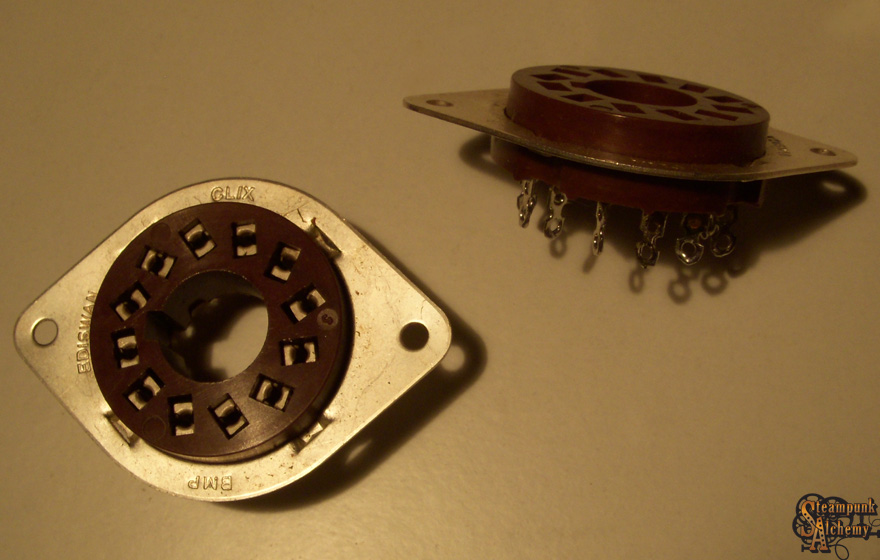
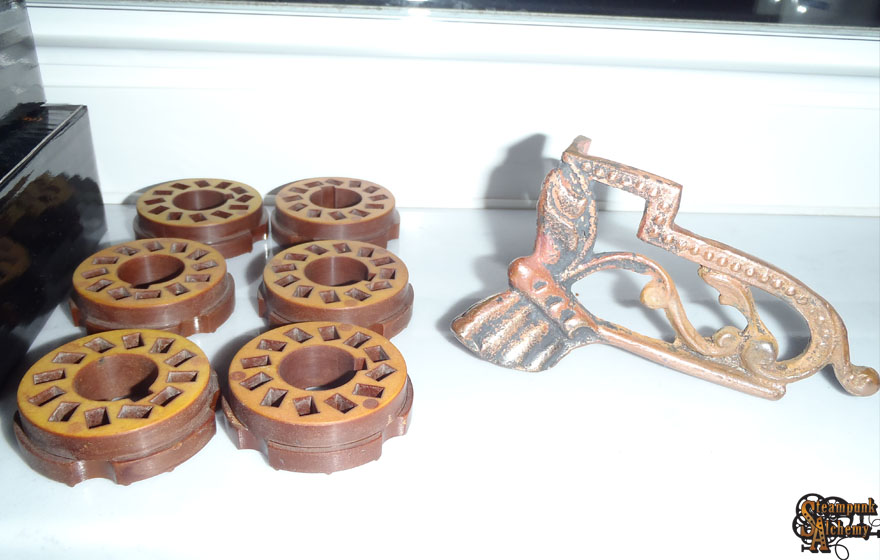
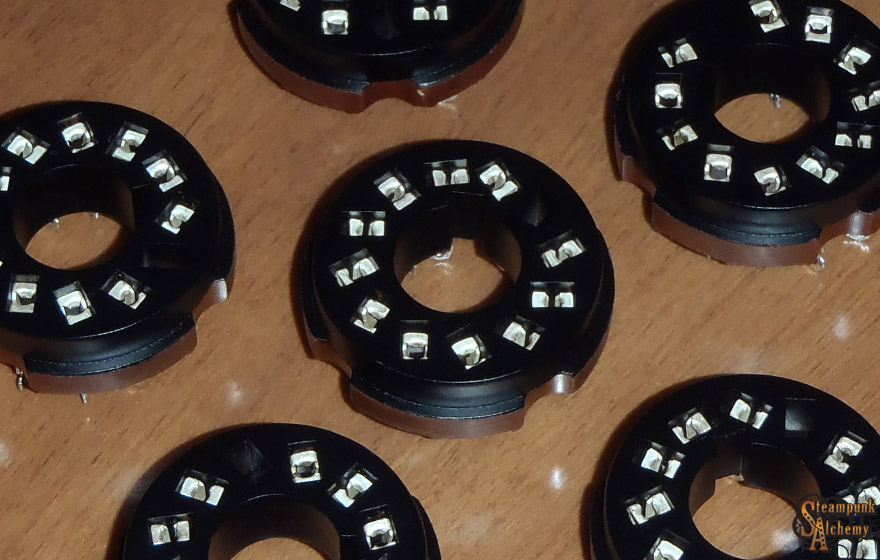
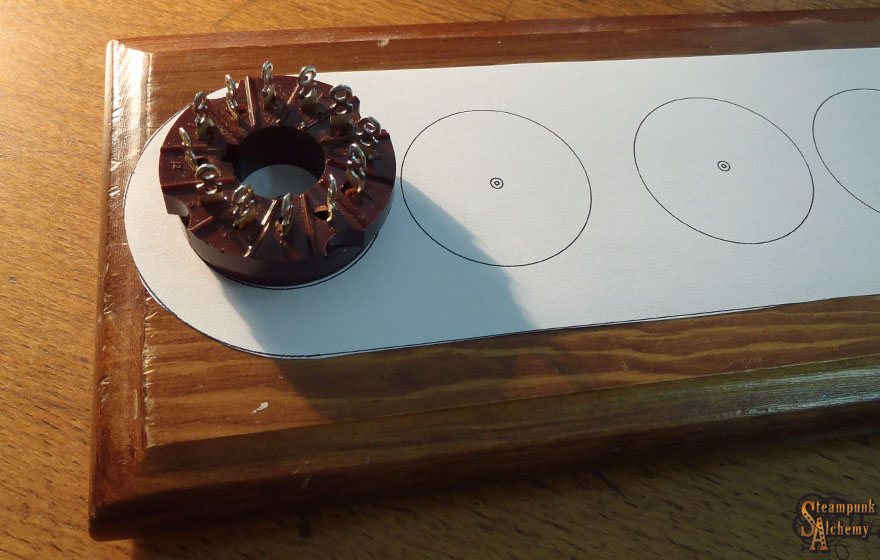
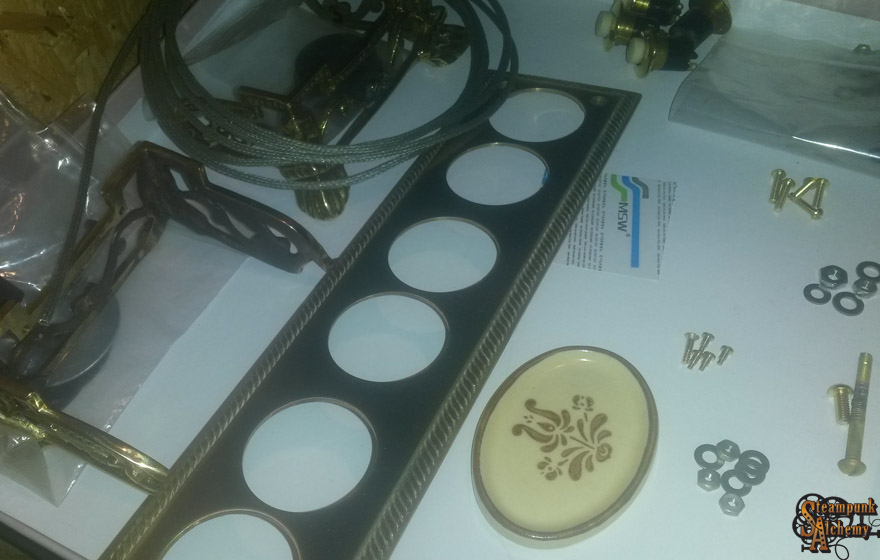
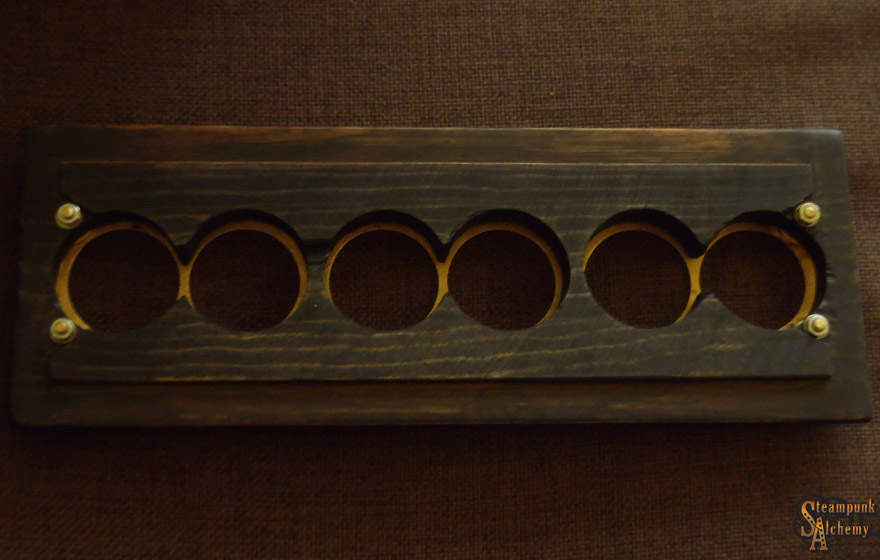
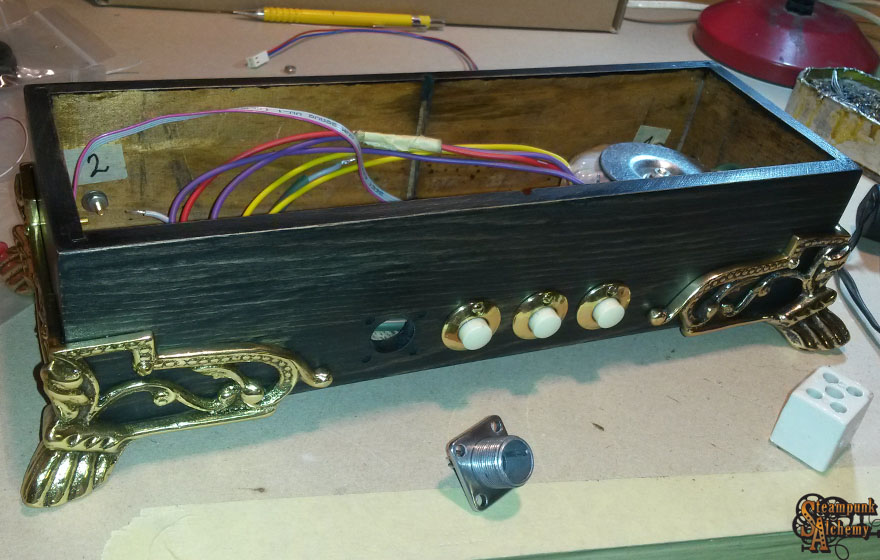
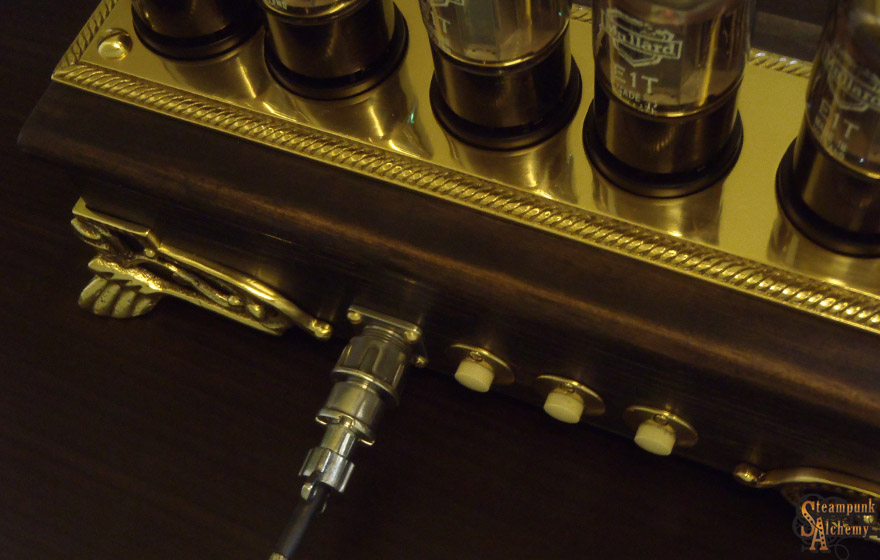
There was one more thing to do: getting appropriate sockets for the tubes. Unfortunately, the only E1t socket that I could find is the B12A that was made by the British EDISWAN CLIX company, which didn't match perfectly as it was made of brown bakelite, and I need black ones! I had no other options; I painted them over so that they would match the tubes' colour scheme. Alas, the metal frame needed to go off; there was no way it could fit aesthetically on the lid. I regretted it at first but later I found a much better solution...
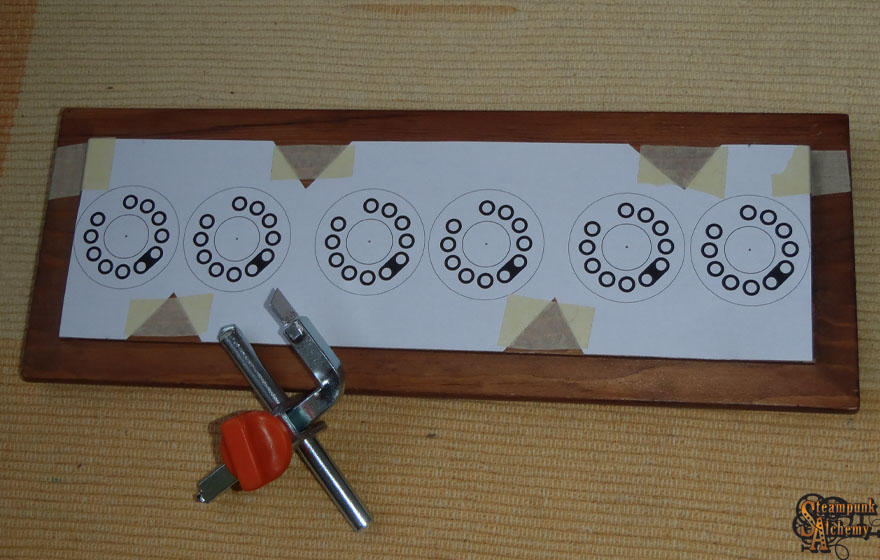
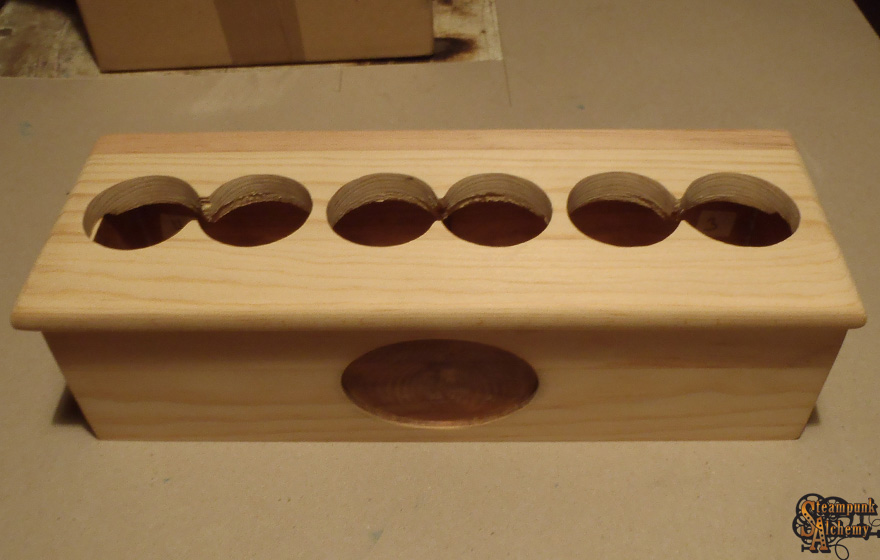
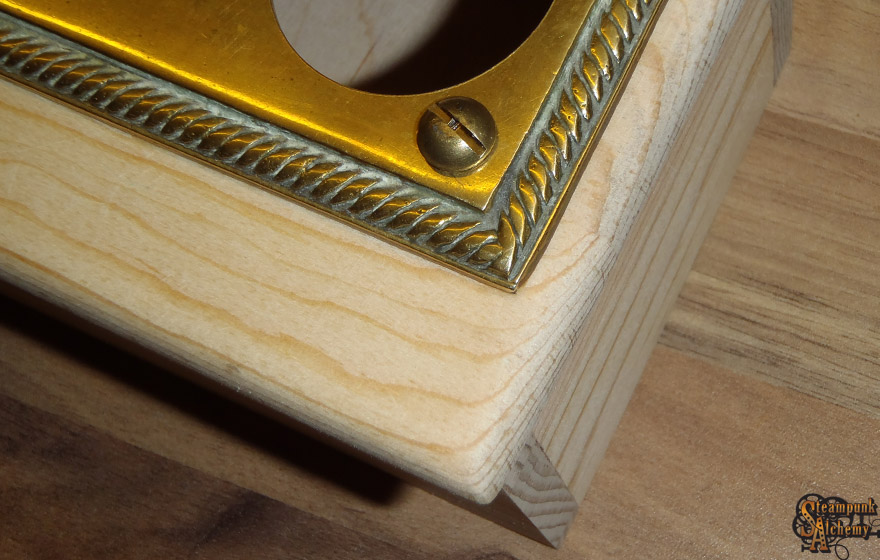
The project continued with the processing of the lid of the box. Some kind of a brass frame was needed that would "close" the tubes and would give them a certain look, if I had to remove the pressing metal frames anyway. I racked my brains trying out several shapes and patterns, and then I found the best solution. I planned out where the six holes on the lid should be very precisely, also on the brass board, which I managed to cut with deadly precision with the help of a hole saw drill bit...

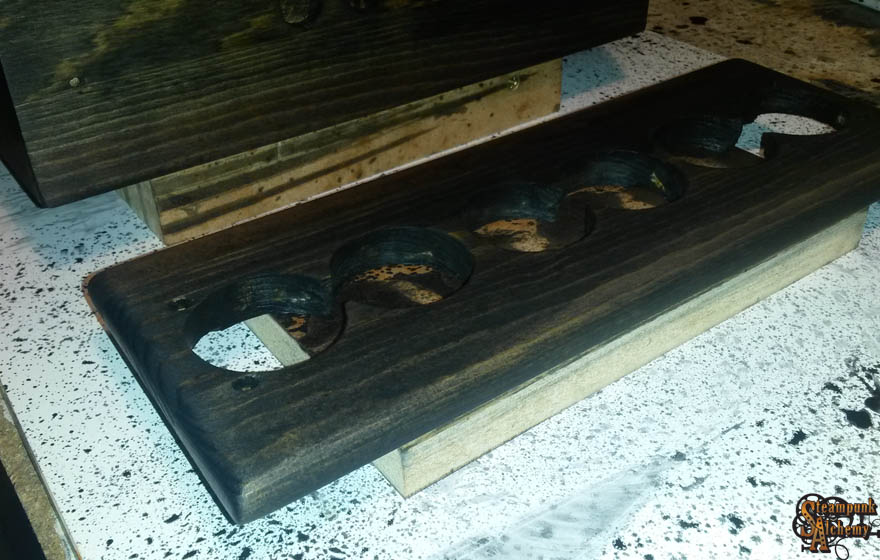
Then I polished the lid, too, and with that the box finally got its raw pinewood look back.
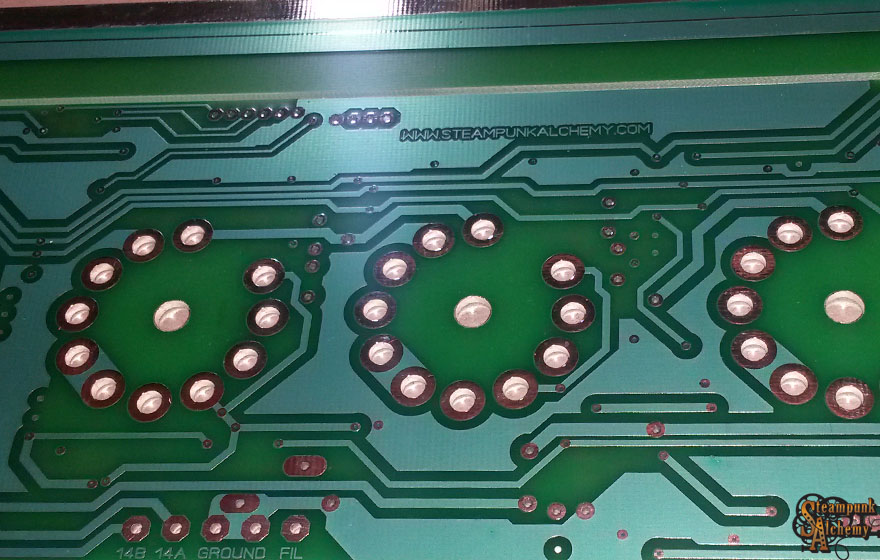
I'm done with the second PCB's prototype, too. It's only 264×74 mm!

The project will soon come to a close, so I started to collect all the metal parts that need polishing and lacquer coating.
I painted the pine box with three layers of black wood stain paint. The surface got no lacquer coating this time; I didn't want it to have a glossy finish. With a special technique I put back a matte finish on it, going with the grain, after painting it, and it got a really unique surface! I got hold of some pretty buttons made of brass, with "U.S. Military Grade" classification! There's only one classification higher than that, and that's used by NASA...

The project continued with the fastening of the previously painted sockets and putting in the tubes. There were a lot of things to consider here: they had to stand in perfect precision, wobbly, unstable tubes are out of the question! My solution to the problem was to glue them in the box in two steps, at first, just three dots near the edges of the sockets, just so it wouldn't let the tubes to fall out. Turning them over the next day I found them flawless, none of them needed extra gluing so I proceeded with applying the other two-component adhesives. As always, I used Loctite Hysol 9461 dual cartridge adhesive, for me that works best!
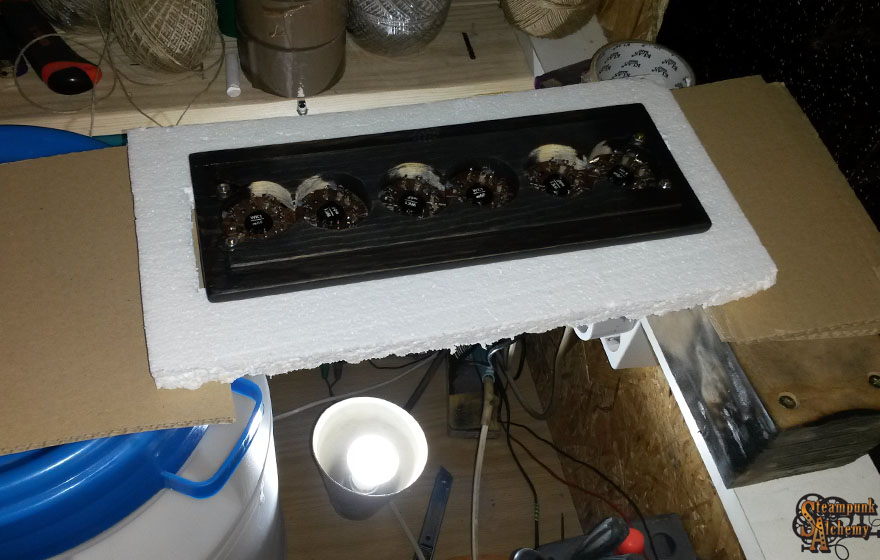
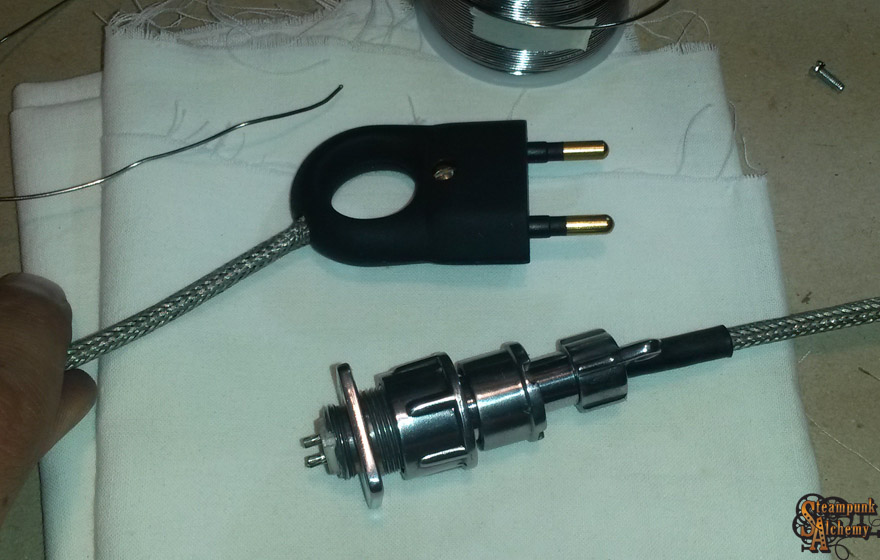
The varnished parts have arrived! I began to assemble the whole box, putting in the pressure switches, the 230 V~ plug and the toroid transformer.

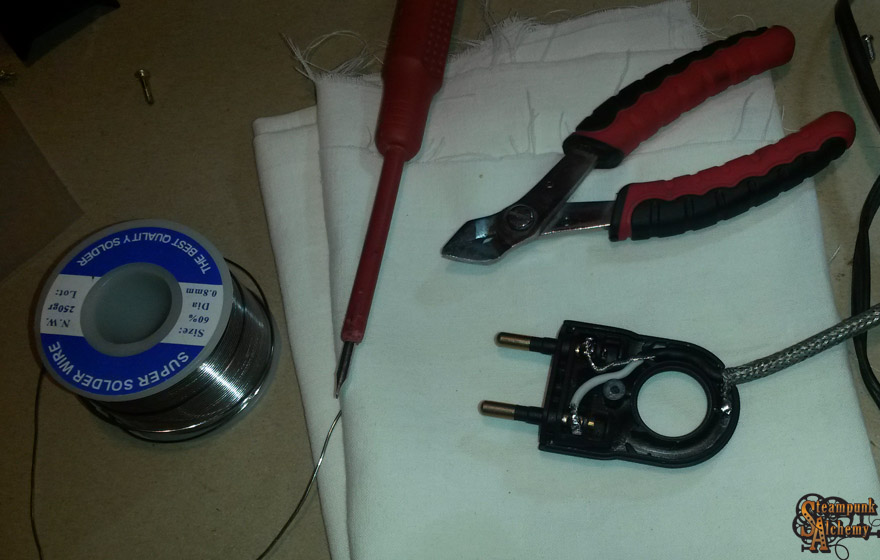
It's almost done! The power plug is a soviet made, and though it seems to be made of aluminum, it is actually made of magnesium! I put my standard braided steel on the cable, while the plug got a matte black finish.
11:00:10
More HQ images in the gallery!


